Yesterday Tom and I went gathering birch bark.
Birch bark was used by the Ojibwe for many of the products they used every day. They made homes and canoes out of birch bark. They made baskets, big and small, out of birch bark.
Birch bark is an amazing material because the inside of the bark is naturally rot resistant. It is a type of cellulose. Cellulose is the most abundant organic polymer on Earth. The inside of the birch bark is almost a polymer – a kind of plastic – so it bends when heated and is very light and water resistant. The outside of the birch bark has a natural preservative called betulin (being used in health supplements today as a natural anti-aging cure). Thus the white part of the bark is resistant to rot by sunlight and helps to preserve food that is placed inside birch bark baskets.
Birch bark canoes are waterproof and lightweight but the outside has to be protected from the sunlight in order to keep the cellulose from breaking down.
Birch bark makuks (baskets) could be used to cache and store food. The Ojibwe would make large makuks with the inside of the bark on the outside (water resistant) and store food in them with the white part of the bark containing the betulin next to the food, acting as a preservative. To store food, the Ojibwe would dig a hole in the ground three to five feet deep, cover the filled makuks with leather, and then bury them. In the winter they could return to a cache and replenish their food supplies.
The Ojibwe homes were also made out of birch bark, with big rolls of the bark acting as siding and sapling poles acting as their support. When it was time to move the home, they would roll up the birch bark and take it with them.
Using birch bark for all these things means that you need a good supply of it, and the end of June and beginning of July are the perfect time to harvest birch bark in northern Minnesota. The natives say that the best time to harvest is when the wild roses bloom – and the wild roses are blooming right now. If you harvest carefully, the tree will not die. It will grow another bark which cannot be harvested but protects the trees.
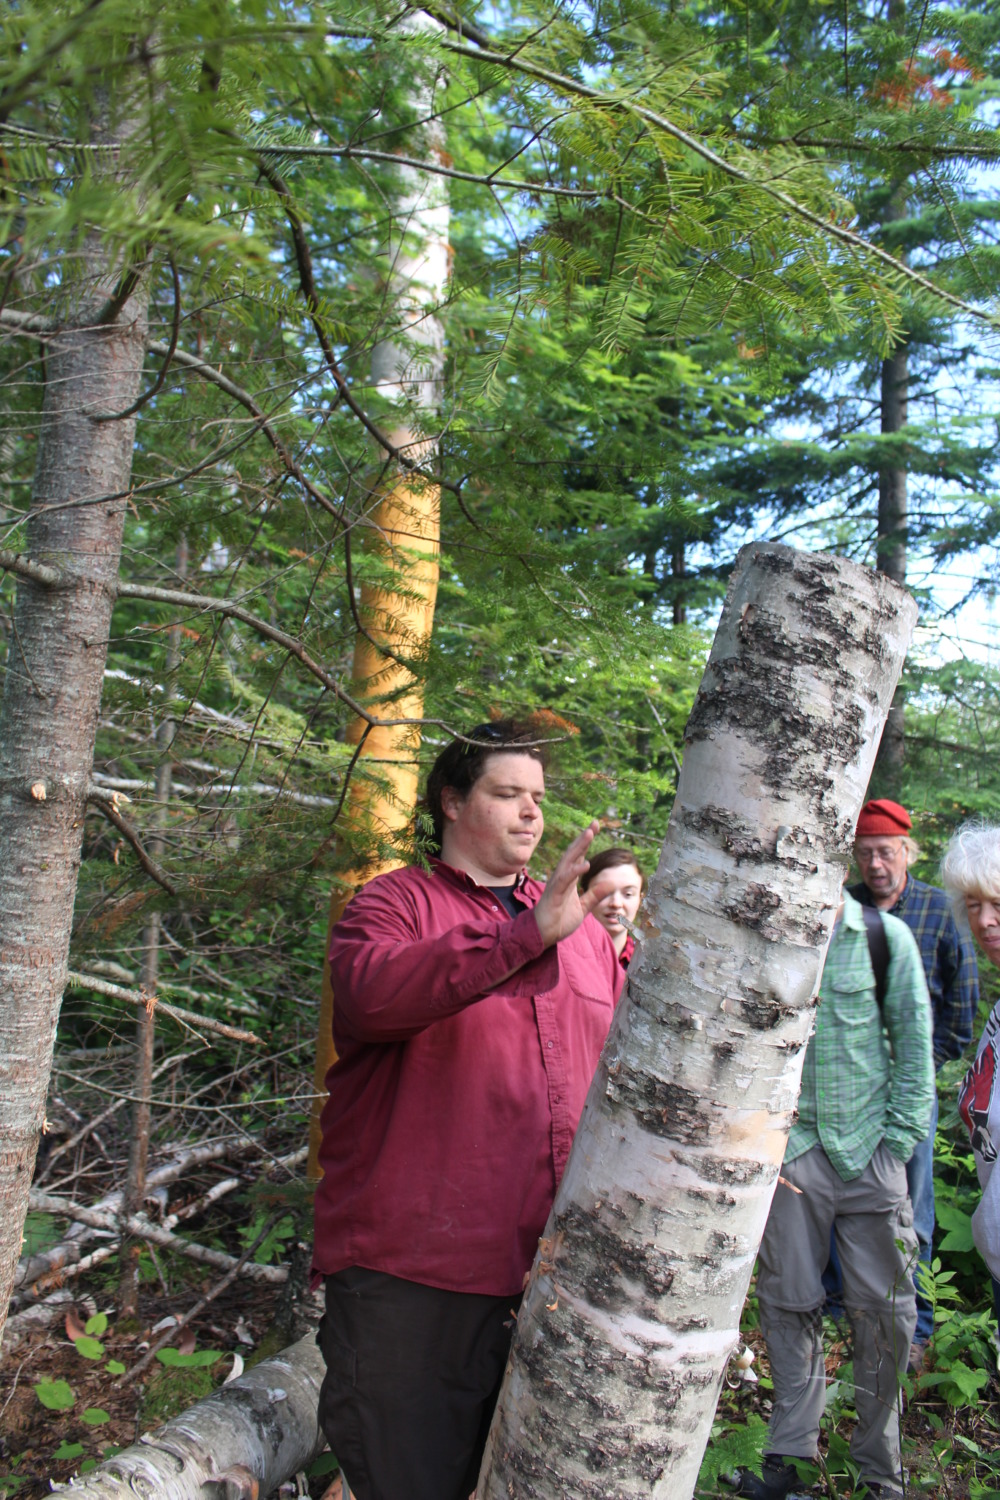
The first step in gathering birch bark is finding a good tree. You want one that is straight with the branches high up. You don’t want too much scarring on the tree – it makes the bark harder to get off in one piece. You also don’t want too many lenticels which are the horizontal lines on birch bark. These are natural tear lines and so they help in getting the bark off the tree, but will also break and tear when you are making something with the birch bark.
The second step is cutting a test strip. When you find a good tree, make a vertical cut about two inches with a small horizontal cut below it, like an upside down T. Then you pull the bark away and check to see if it is the thickness and quality that you want for your project.
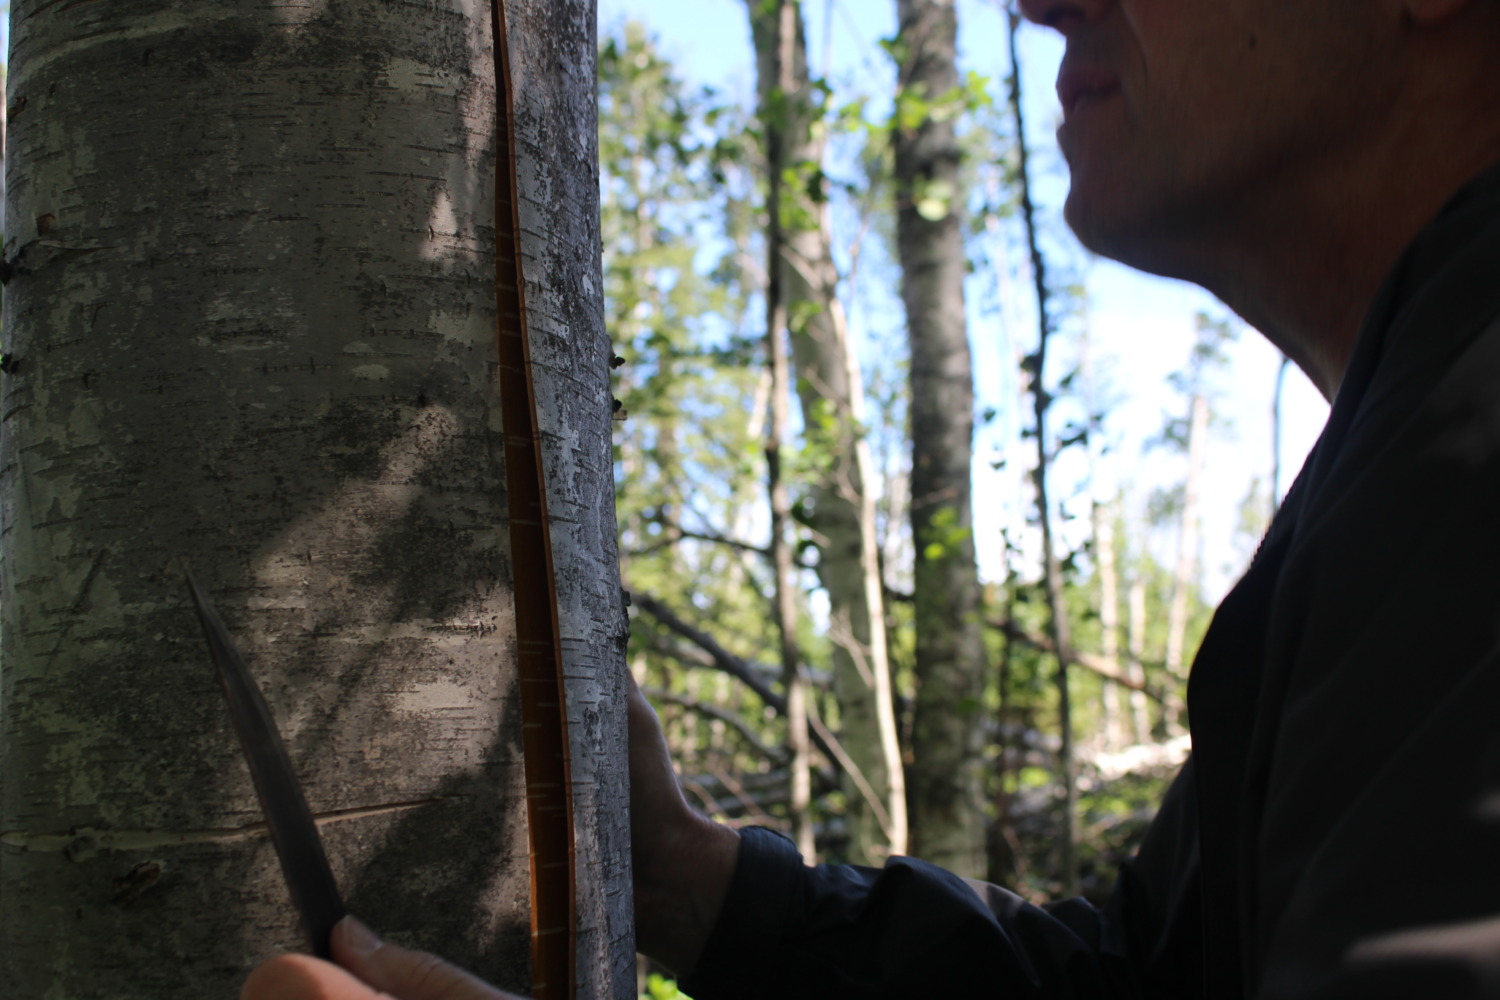
The third step is making the incision for the piece of bark. Once you have determined that it is a good tree for bark, make a long vertical incision. You want to do this on the smoothest part of the bark because it will be less likely to tear or split as you pull it off. It is also the best line for stitching when you are sewing your project together. The incision needs to be deep enough to cut through the bark but not cut into the cambium. If you cut the cambium you will probably kill the tree. Cutting just the right depth takes some practice.
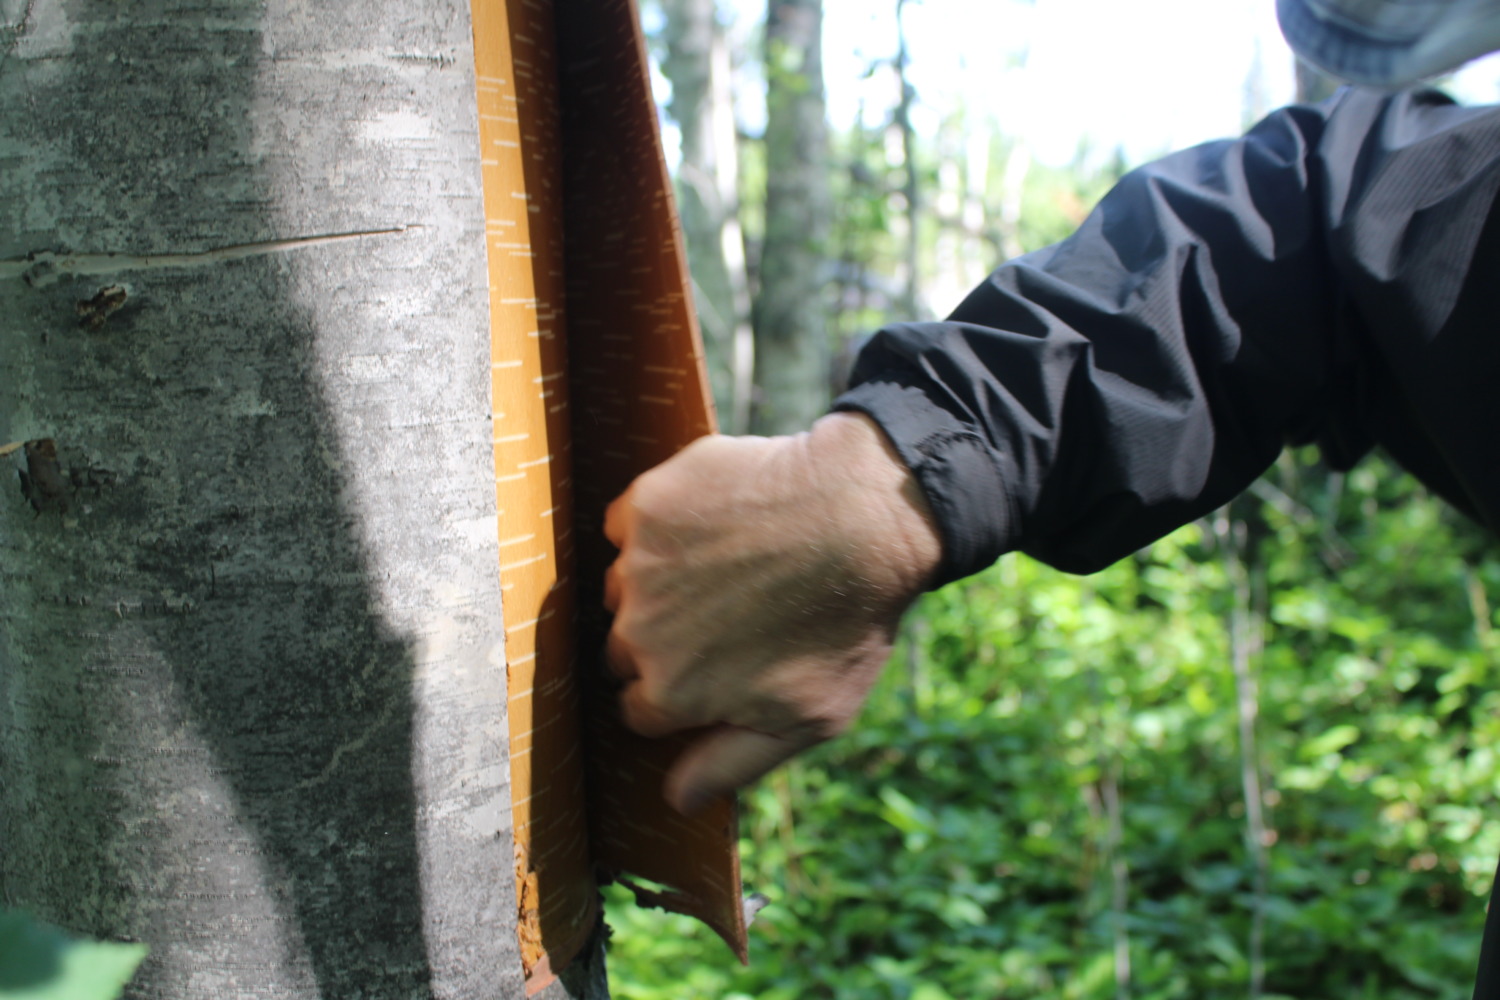
Once you have made the incision, you move on to the fourth step, gently prying the edges of the incision away from the tree. If you have picked a good bark it will start peeling easily, just by running your knife up the edge. If your piece has too many lenticels or scars it will tear or split at the edges.
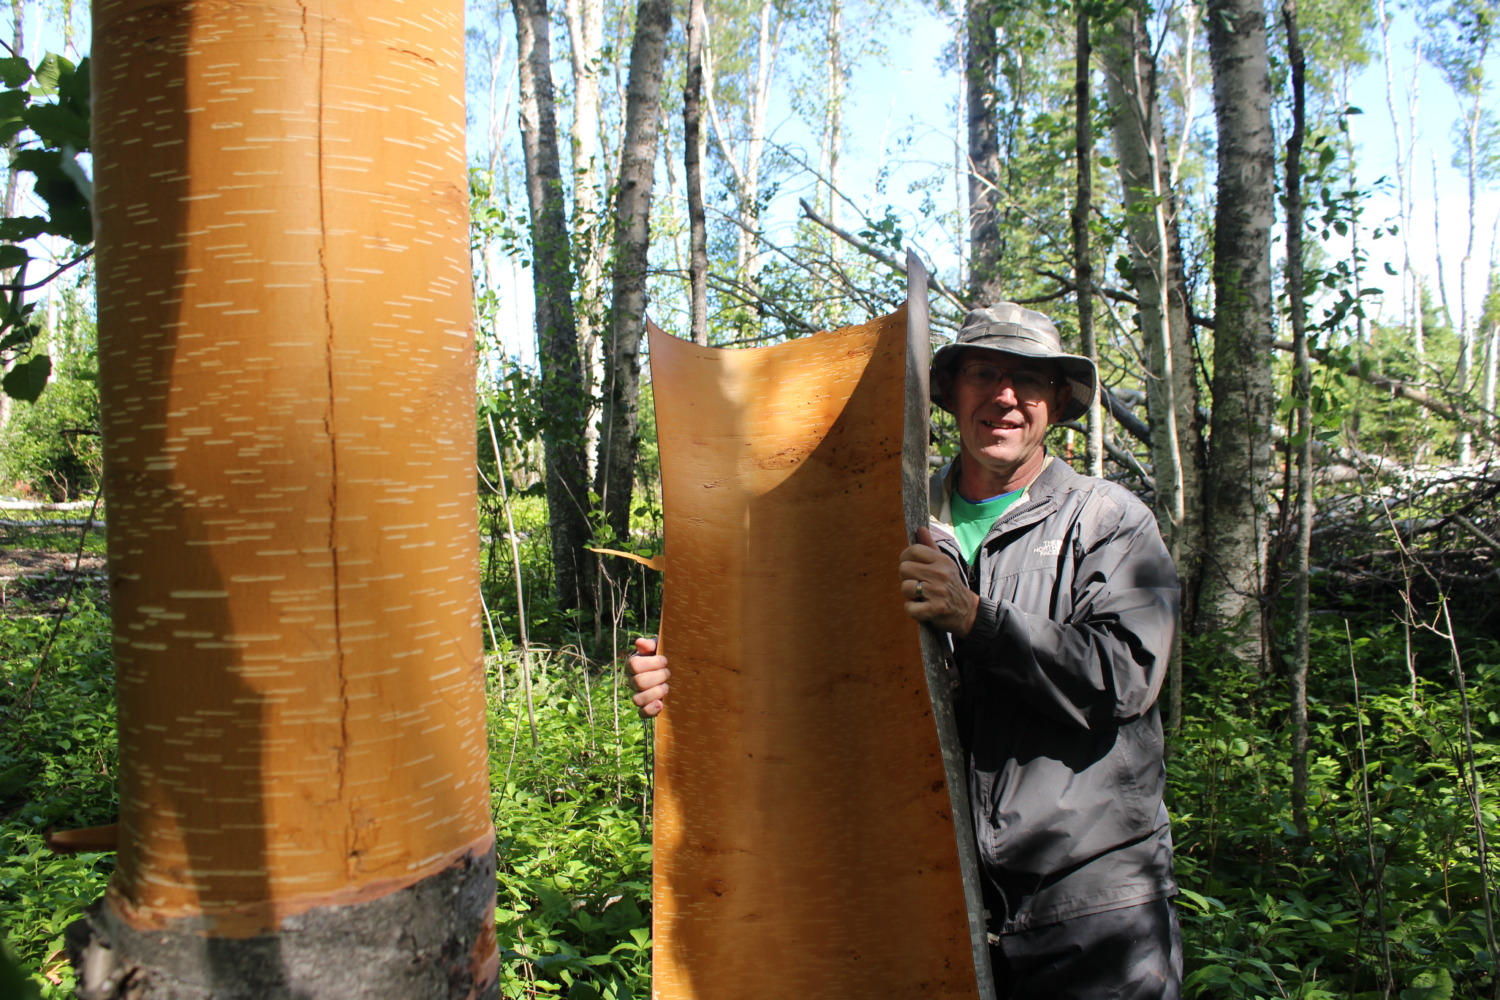
The fifth step is slipping your hands under the bark and gently loosening the bark from the tree until it comes off. There may be a few places where you have to use a knife to cut it loose, but a good piece of bark almost “pops” off the tree at this point.

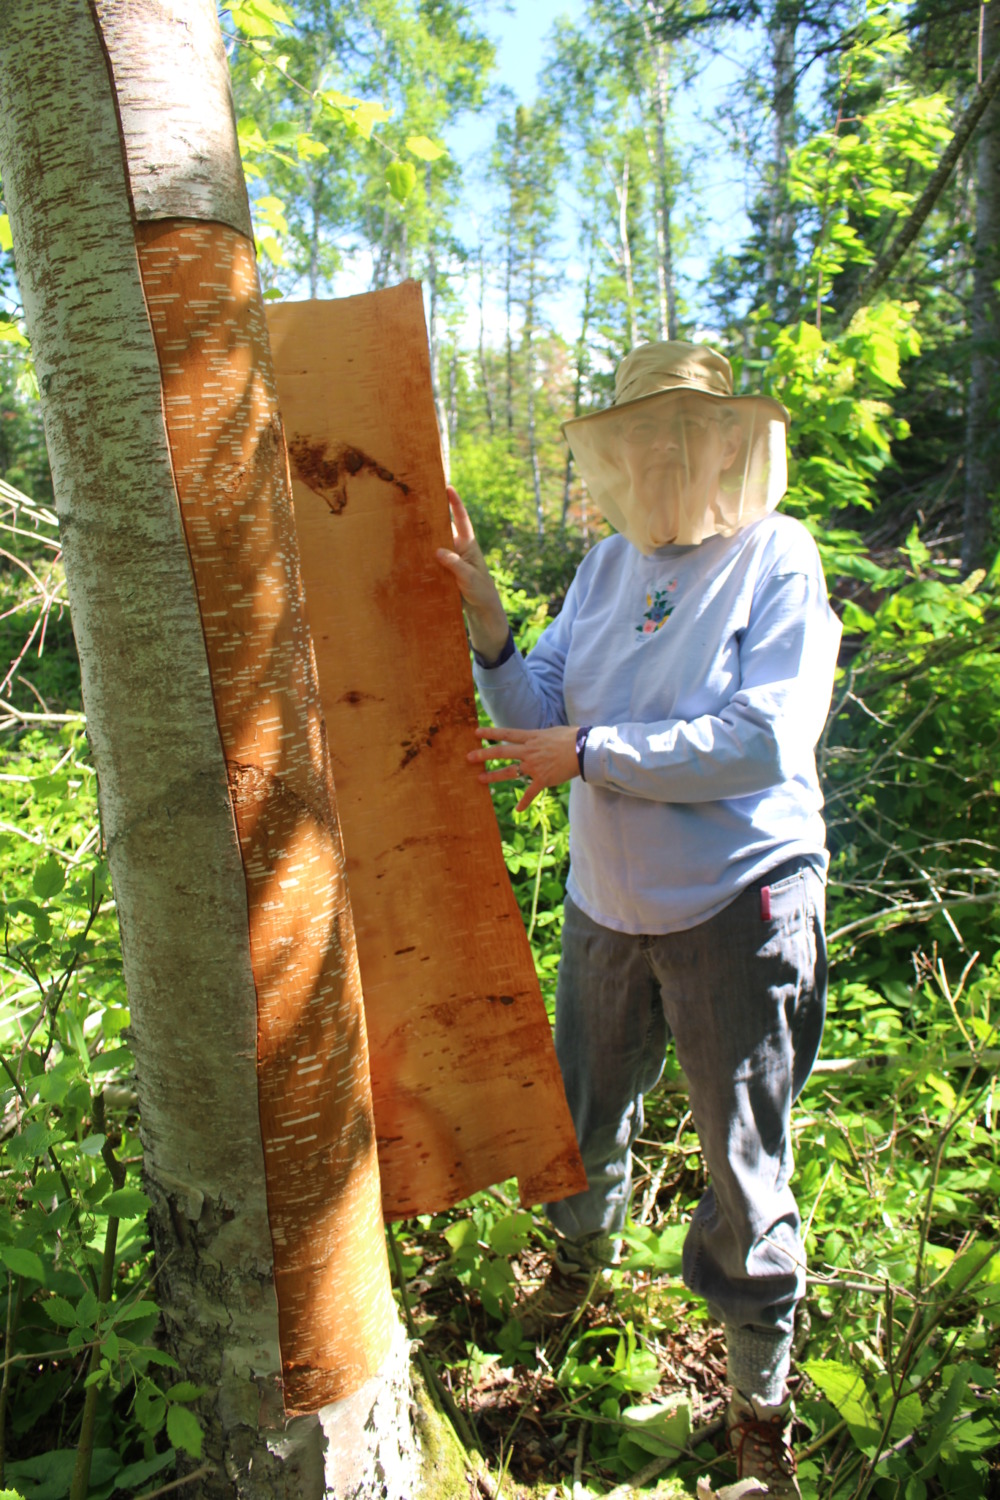
Sixth, you store the bark until you are ready to use it with the inner bark side down (away from sunlight). We put it in the back of a park truck and then stored it underneath one of the historic buildings, ready to be used in the future.
Tom and I really enjoyed gathering birch bark. It was a gorgeous day to be out in the woods and we got to do something we had never done before. We love learning new things – even if they are really very old skills!