
 Tom and I completed and test-drove our first project – a Topographic Battle Map – a couple of weeks ago. One of our duties at Kings Mountain is to do some special projects and the first one we were assigned was a portable topographic map of the battlefield where school children can re-enact the battle with the hundreds of plastic soldiers we painted. Most of our first month at Kings Mountain, when we weren’t helping out at the desk, involved working on this project. The rangers here had been dreaming of a battlefield map like this for a couple of years, but didn’t have the time to actually construct it.
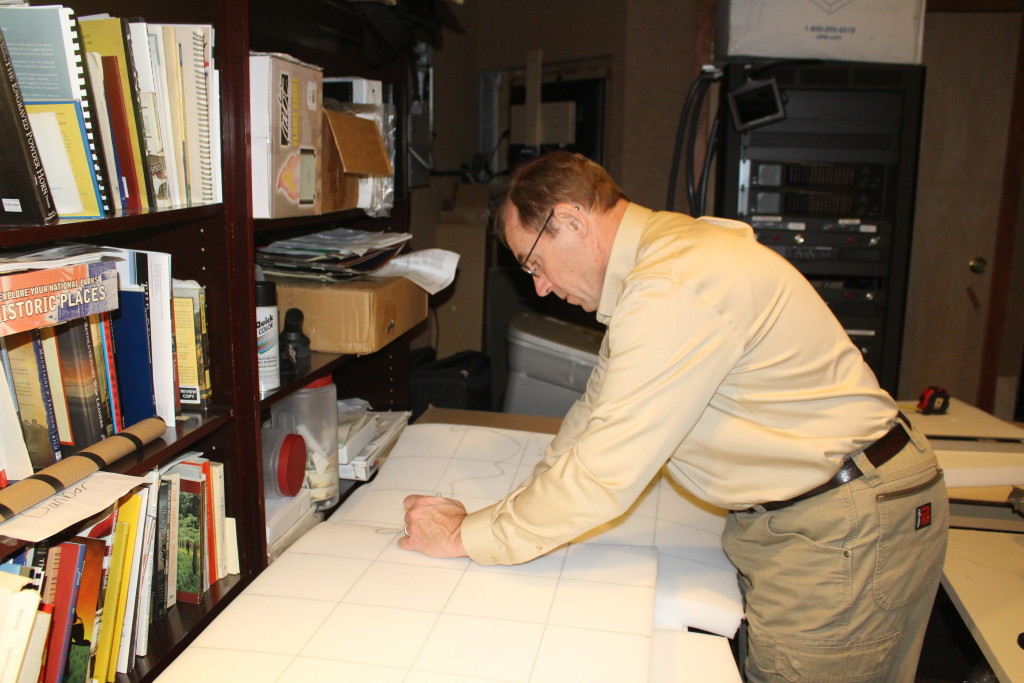
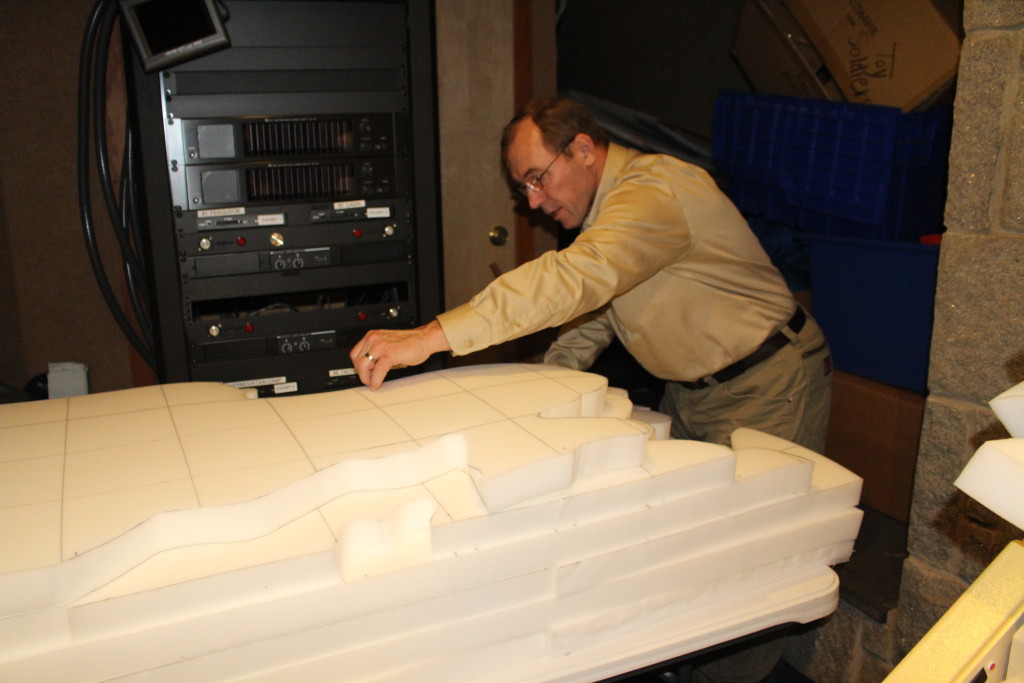
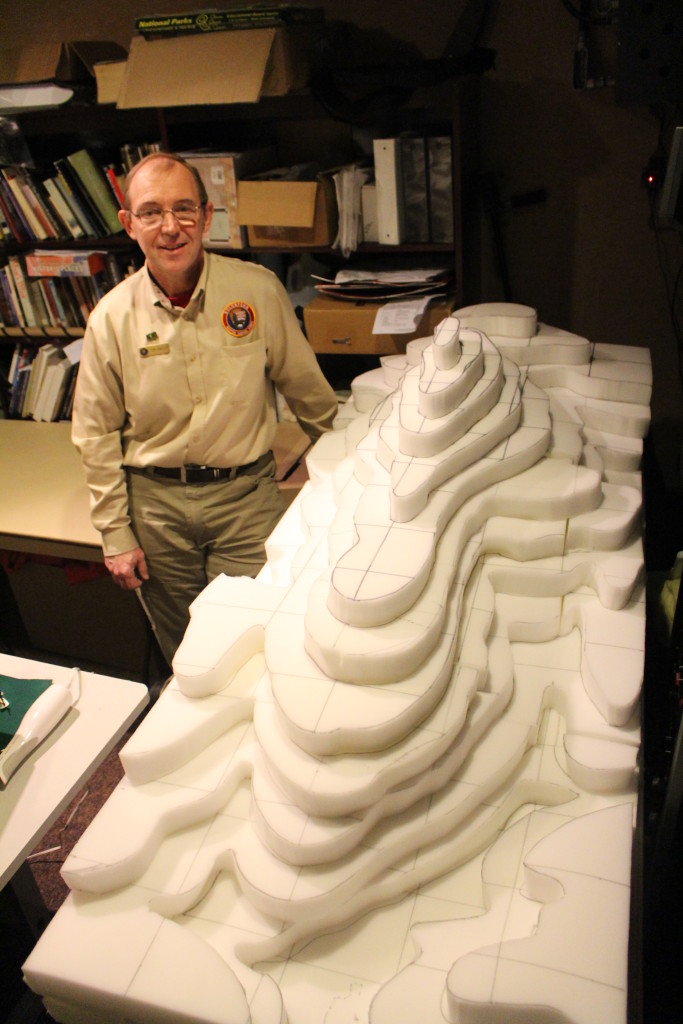
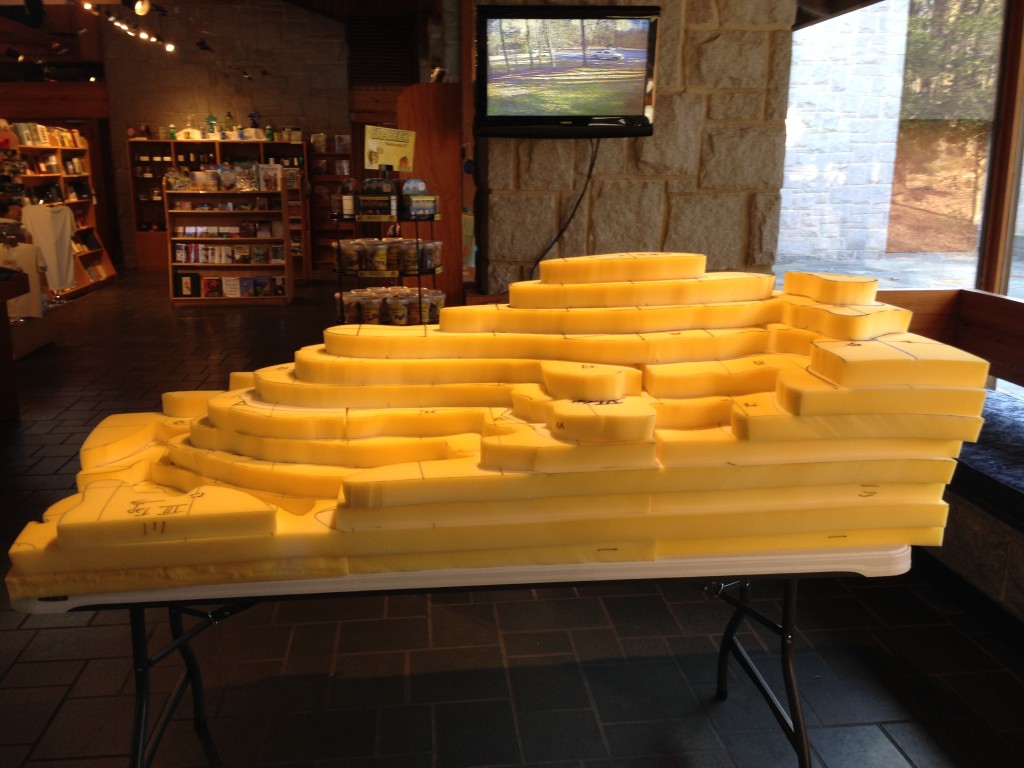
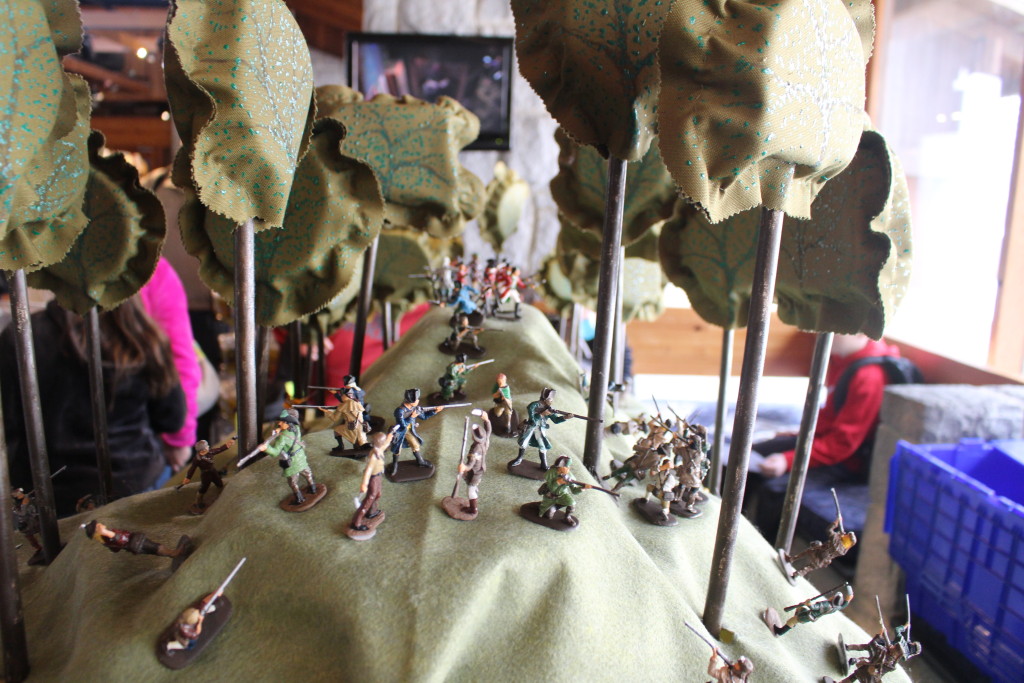
Tom and I started by studying topographic maps of the area and determining how much of the battlefield we could build. Then we laid out a layer of soft foam for every 20 feet of elevation change. We marked a grid, then Tom drew the lines from our topographic paper map and we cut the layers into the correct shapes. One of the hardest thing was finding something that would cut the foam without tearing it up. We tried a knife, and saw, and sewing shears, but each one left a jagged edge that wasn’t acceptable. We looked it up on that endless source of information – the internet – and found out an electric knife like you use with food was the best method. We bought a cheap electric knife and it worked like a dream. The layers were easy to cut and the edges looked great. We ended up with a mountain that is 11 layers (22 inches) tall.

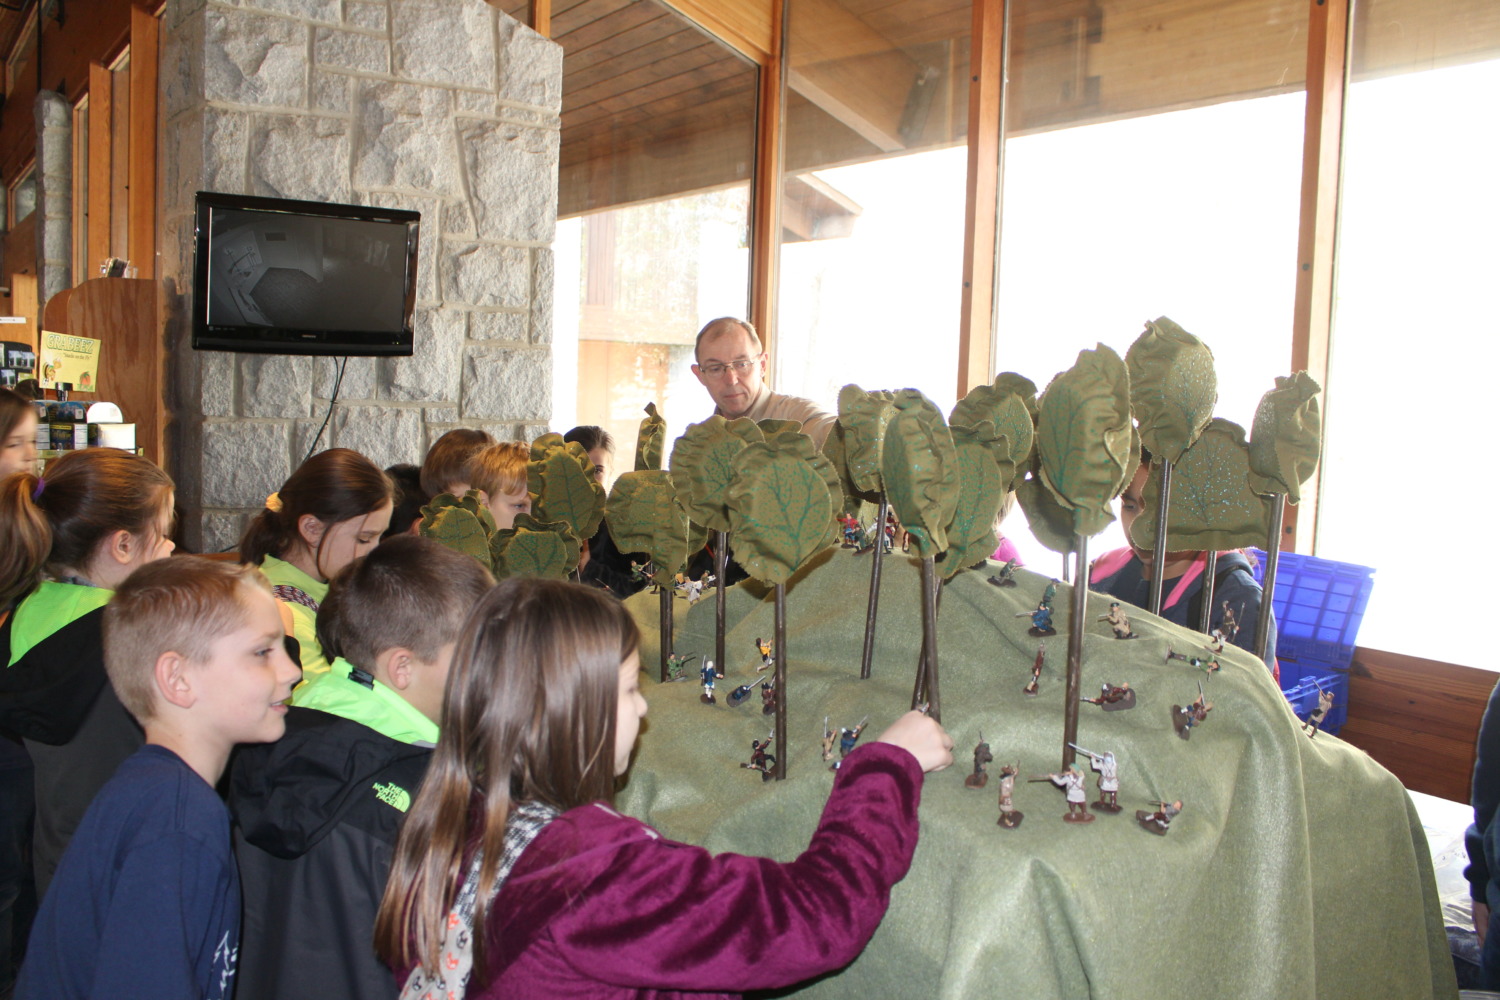
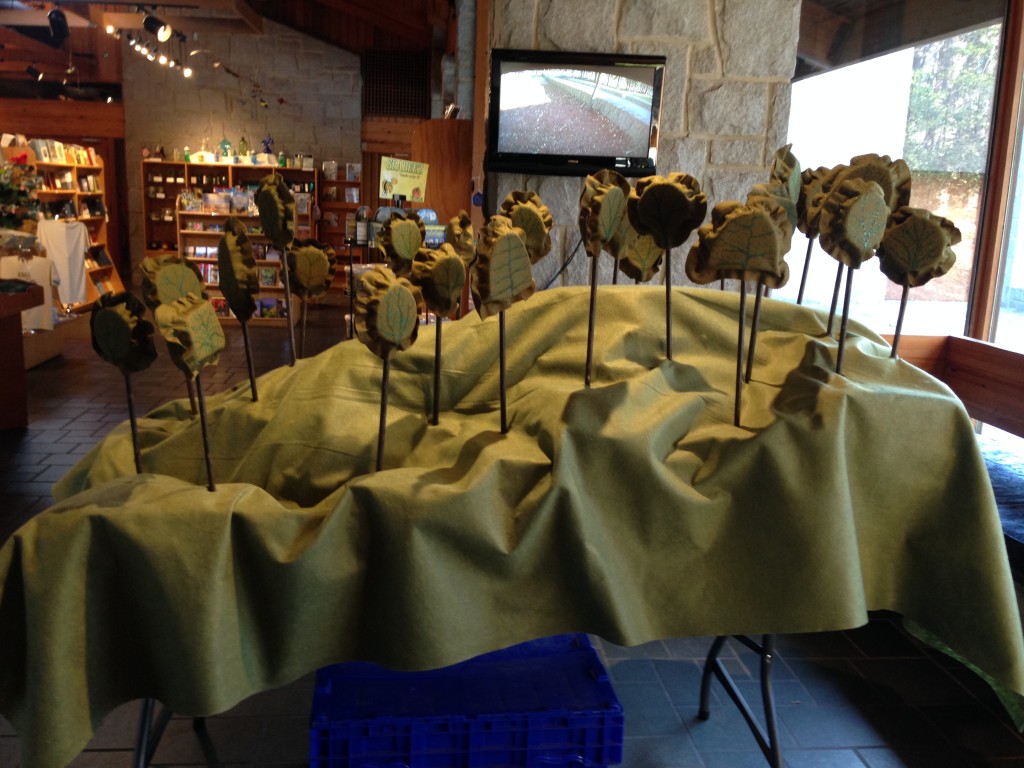
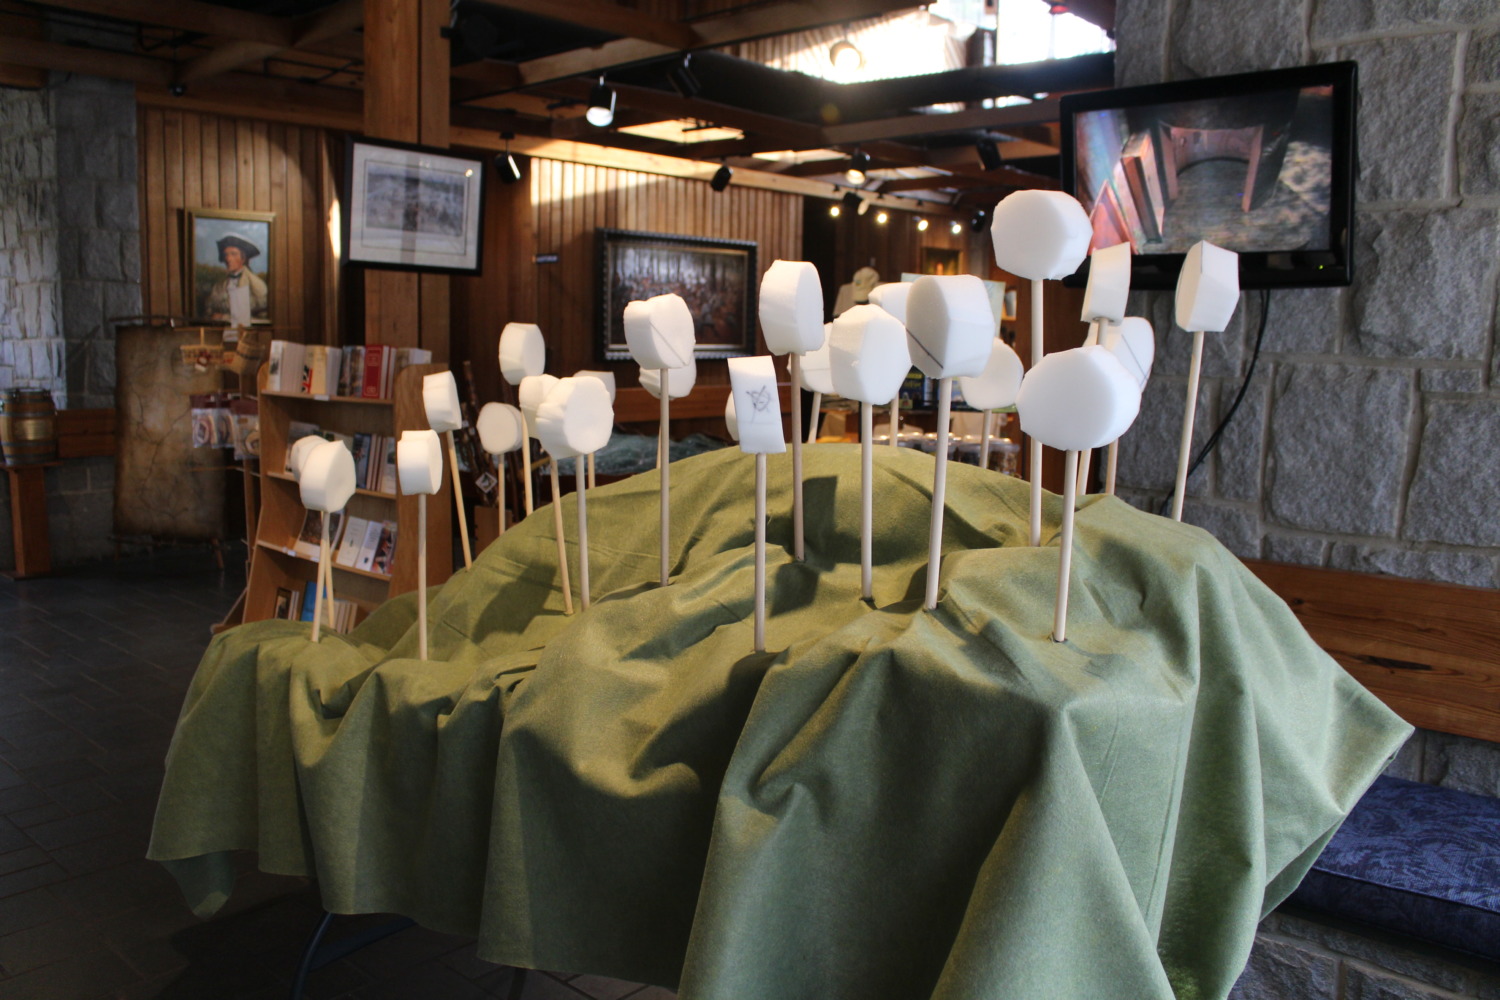 But that definitely wasn’t the end of our completed project. Next we took some felt and laid it on top of the topographic layers. Then we cut holes through the felt and the foam and stuck dowels in the holes. These dowels hold the felt on the layers of foam and represent the trees that were on the sides of the mountain at the time of the battle. We cut “trees” out of more foam and I sewed and painted “leaves” on them. Tom added the branches (he draws good branches!) and we put the trees on top of the dowels to suggest the trees.
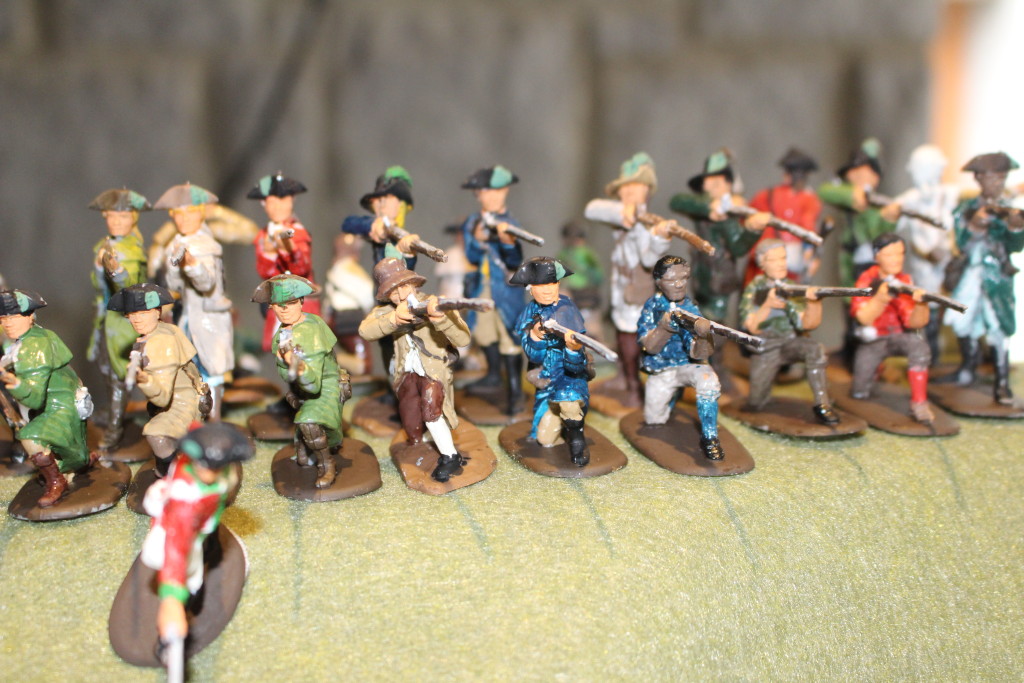
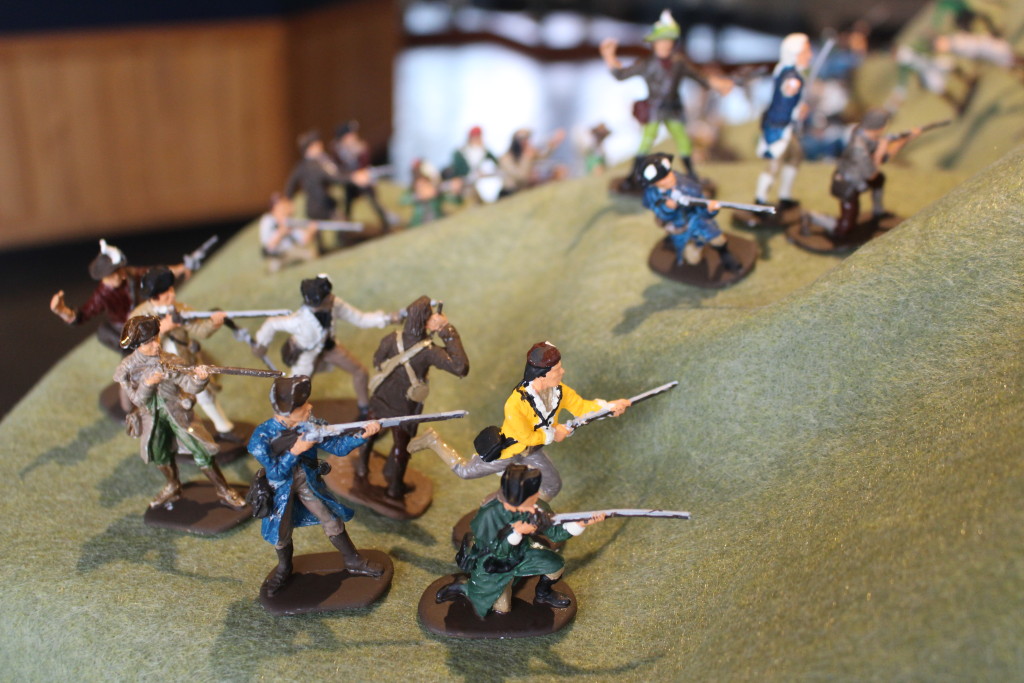
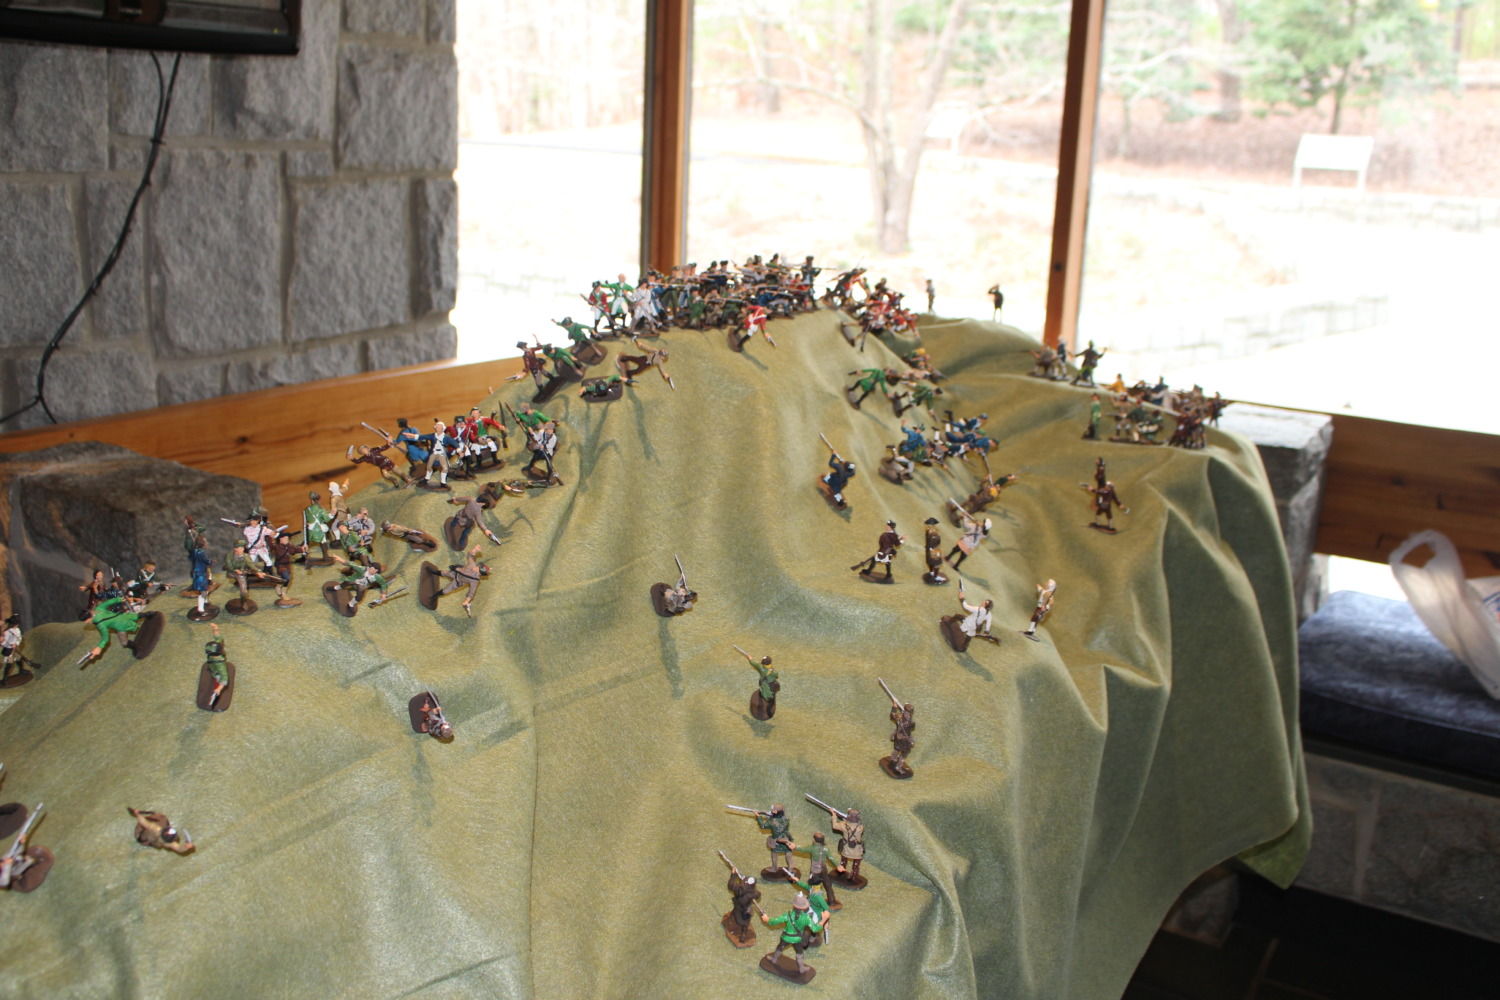 We put little velcro dots on the bottoms of all our painted soldiers and divided them up into Loyalist and Patriot forces and gave them commanding officers. Now they will stick to the felt and can be moved around.
As a final step we spent a couple of weeks writing the curriculum for the topographic battle map project. There is a 45 minute segment where school kids can learn about topographic maps. There is also a 45 minute segment where school kids can follow the order of battle step by step and move soldiers on the battlefield to see what happened.
Before we could say we were finished, we had to test the Topographic Battle Map on our target audience. Two weeks ago there was a field trip that brought 100 students to the battlefield. In groups of 25 at a time, Tom and I led a class re-enacting the battle. We had two groups in the morning and two groups in the afternoon. The first group didn’t go particularly well, due to our overestimating the reading level of 4th graders (we were basing the reading level on ourselves but I don’t think we were typical 4th graders). In the second group I read the order of battle instead and it went better even though I was improvising half the time. Instead of eating lunch, Tom and I worked furiously to rewrite this part of the curriculum. Consequently, the afternoon went much smoother and the children seemed to really enjoy and stay involved in the lesson.

Tomorrow we try the Topographic Battle Map again with 7th graders. Even though they can read better than 4th graders (we think) I am still going to narrate the battle while the kids move the soldiers around and participate in other ways.
This Topographic Battle Map was a lot of fun for us to put together and we think the rangers will be able to use it after we are gone to teach groups at the Visitors Center and in the classroom. We even built a box that they can use for transport. We hope that it is a valuable tool for the rangers as they teach school groups about what happened on October 7, 1780 at Kings Mountain.
One comment